

Key Takeaways
- Wrong colors printing is almost always a clogged inkjet nozzle, a low or empty color cartridge, or a color setting like grayscale left switched on.
- Start with a nozzle check or test page; it tells you in seconds which color is missing before you touch anything else.
- A single missing color (a photo that looks too red or too green) usually means one blocked channel, not a broken printer.
- Laser printers show color problems from a low toner cartridge, a seated-wrong cartridge, or a tired drum.
- Check the cheap, quick things first: settings, ink levels, and color mode, before you buy any new supplies.
You print a family photo and everyone looks sunburned, or a blue chart comes out purple, or the reds have vanished entirely. Wrong or missing colors are one of the most frustrating print problems, but they are also one of the most predictable. In years of testing inkjets and lasers on my own desk and fixing them for friends, I have found the cause almost always sits on a short list. By the end of this guide you will know how to spot exactly which color is failing, why it is happening, and the simple steps to bring accurate, true-to-life color back to your pages.
First, Pin Down What “Wrong” Looks Like
Before you change a single setting, look closely at the bad print. The exact way the color is off tells you where to look. Wrong colors usually fall into one of a few patterns.
- A color cast, where the whole page leans too red, blue, green, or yellow.
- A missing color, where reds or blues simply do not appear and skin tones look wrong.
- Everything in gray, when a color document prints in black and white.
- Banded or patchy color, where shades shift across the page in stripes.
A color cast or a single missing color points to an ink or nozzle problem. An all-gray page almost always points to a setting. Patchy, banded color usually means a partly clogged head or a low cartridge. This one observation saves you a lot of trial and error.
The Most Common Causes of Wrong Colors Printing
Most color problems trace back to a handful of causes. Here they are in the order I check them, from the fastest and cheapest to the more involved.
| Cause | Printer Type | How Fast to Fix |
|---|---|---|
| Grayscale or black-only mode on | Both | Under a minute |
| Low or empty color cartridge | Both | Minutes |
| Clogged or dried print head | Inkjet | 5 to 30 minutes |
| Cartridge seated wrong or tape left on | Both | Under 5 minutes |
| Wrong paper type or color profile | Both | Under a minute |
| Worn drum or transfer belt | Laser | Longer (part swap) |
1. Grayscale or Black-Only Mode Is On
This is the first thing I check when a color page comes out gray. Many print dialogs have a “print in grayscale,” “black ink only,” or “monochrome” checkbox that is easy to leave on by accident. Open your print settings and make sure color printing is selected before you suspect the ink. It costs nothing to check and fixes this problem instantly.
2. A Low or Empty Color Cartridge
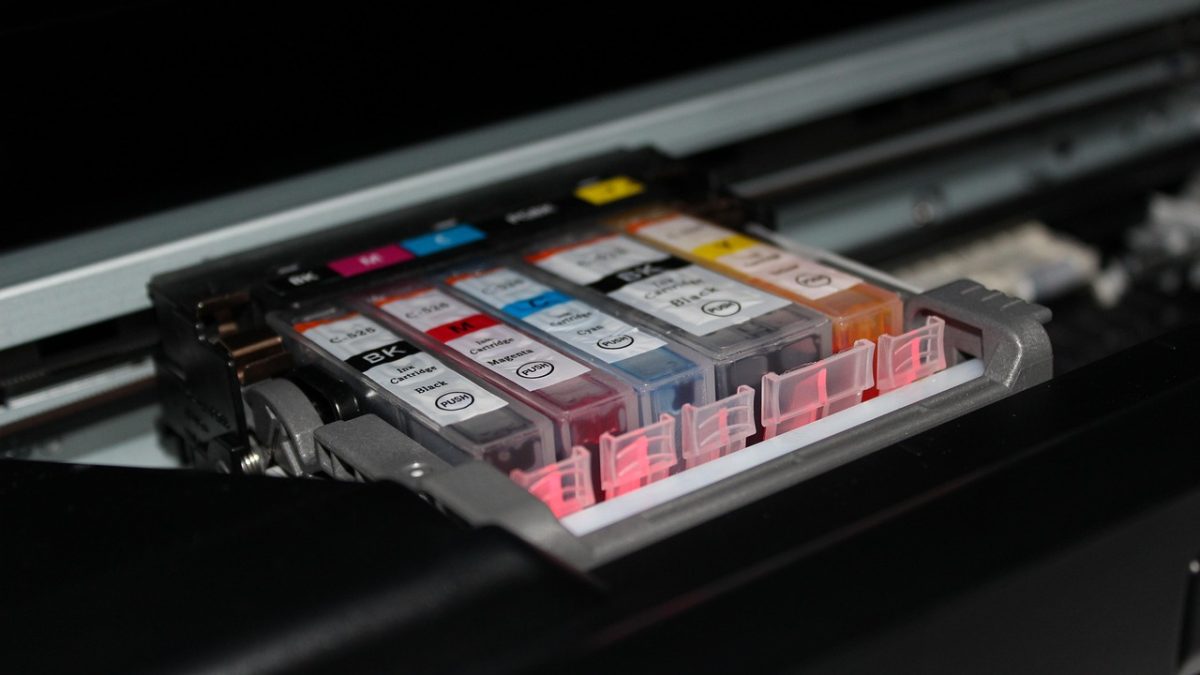
Inkjets mix cyan, magenta, and yellow to make every color. If one of those runs dry, the printer cannot mix correctly and the results shift. An empty magenta makes photos look too green; an empty yellow makes them look blue or purple. Check your ink levels in the printer software and note which color is low. That one clue often explains the exact cast you are seeing.
3. A Clogged Print Head (Inkjet Only)
If your inkjet has sat unused for a week or two, dried ink can block the tiny nozzles for one color. The cartridge still shows full, but that color barely reaches the page, so reds fade or blues turn wrong. The fix is a nozzle check followed by a cleaning cycle, which I walk through below. For a deeper look, see our guide on how to clean a clogged print head step by step.
4. A Cartridge Seated Wrong or Tape Left On
After a fresh cartridge swap, a color can go missing simply because the new cartridge did not click fully into place or still has its protective tape covering the vent or nozzle. Pop the cartridge out, remove any orange or clear tape, and reseat it until you feel it lock. This quick check fixes a surprising number of sudden color problems.
Tip: Before you buy anything, print your printer’s built-in nozzle check or color test page. It lays down a solid block of each color, so a missing or streaky block instantly shows you which channel is failing. This one page turns guesswork into a clear answer.
How to Read a Nozzle Check or Color Test Page
The nozzle check is the single most useful tool for color problems, and learning to read it takes only a moment. A healthy page shows clean, solid, evenly filled blocks or ladders for each color.
- A completely blank block means that color is fully clogged or empty.
- A faint or broken block means a partial clog or a low cartridge.
- Solid, even blocks all around mean your nozzles are fine and the problem is a setting or profile.
If you are unsure whether you need a quick clean or a stronger one, our comparison of nozzle check vs deep clean explains when each makes sense, so you do not waste ink on a cleaning you did not need.

Inkjet vs Laser: Why Colors Go Wrong Differently
The two main printer types produce color in different ways, so knowing which you have narrows the cause fast.
Inkjets spray liquid ink through microscopic nozzles and mix colors on the page. When one color’s nozzles dry up or a cartridge runs low, the whole balance shifts and you get a cast or a missing color. Inkjets that sit idle are the most common victims, which is why I run a color test page on my home inkjet every couple of weeks just to keep the ink moving.
Laser printers fuse powdered toner in four colors onto the page with heat. They show color problems when one toner cartridge runs low, when a cartridge is not seated fully, or when a drum or transfer belt wears out. If your laser shows a color that is faint on one side or repeats a light patch, the drum is often the reason. Our guide to drum and roller fixes for laser print defects covers those repairs in detail.
A Simple Fix-It Routine
Here is the exact order I follow when colors come out wrong. Work through it top to bottom and stop as soon as your colors look right.
- Open the print dialog and confirm color printing is on, not grayscale or black-only. Expect the next print to show color again if this was the cause.
- Check ink or toner levels in the printer software and note any color that is low. Expect the cast to match the missing color.
- Reseat each color cartridge and remove any leftover protective tape. Expect a firm click when it locks in.
- For inkjets, print a nozzle check to see which color is weak or missing. Expect one block to stand out as faint or blank.
- If the check shows gaps, run one standard cleaning cycle, then reprint the check. Expect the weak block to fill in.
- Match the paper type in settings to the paper in the tray. Expect richer, more accurate color on the right setting.
- Reprint your document. Expect true, balanced color; if not, repeat the nozzle check once more.
If your colors are technically present but just look flat or off in photos, the problem may be a setting rather than the hardware. Our roundup of 9 print settings that ruin photo quality walks through the ones that quietly wreck color.
Warning: Do not run cleaning cycles over and over in a row. Each cycle uses a real amount of ink. Run one, print a test page, and wait a few minutes before trying another. Three back-to-back cleanings can drain a cartridge faster than the color problem ever would.
Getting Accurate Color, Not Just Any Color
Once every color is printing, you may still notice photos look slightly off from your screen. That is normal. Screens glow with light while paper reflects it, so a perfect match is rare without extra effort.
Two simple habits get you very close. First, match the paper type setting to the actual paper, since the printer changes its ink mix based on that choice. Second, let the printer manage color rather than turning on two color systems at once, which can double-correct and skew the result. Good paper helps too; our roundup of the best papers for sharp, clean prints shows why the sheet matters as much as the ink.
If you want the science behind why colors mix the way they do, the basics of the CMYK color model are a short, helpful read.
When to Suspect a Real Hardware Problem
Most color problems clear up with the steps above. But if you have swapped in fresh supplies, corrected every setting, and run a couple of cleaning cycles with no change, the hardware may need attention.
On an inkjet, a color channel that stays blank after several cleanings may be permanently clogged and need a new print head or, on many home models, a new printer. On a laser, a worn drum or transfer belt will skew color no matter how much toner you add. At that point, weigh the repair cost against a new machine. For a full walkthrough of every quality issue, the complete guide to fixing print quality problems is the best place to start, and our print quality troubleshooting checklist gives you a quick page to work through. You can also read how we test and verify our advice on our about us page.
Frequently Asked Questions
Why is my printer printing the wrong colors when the cartridges are full?
Full cartridges and wrong colors usually mean a clogged nozzle or a color setting, not empty ink. Dried ink can block one color’s nozzles even when the tank reads full. Print a nozzle check to find the weak color, run one cleaning cycle, and confirm color mode is on, not grayscale.
Why does my photo print too red, green, or blue?
A strong color cast usually means one ink color is low or clogged, so the printer cannot mix correctly. Too green often means low magenta, too blue or purple means low yellow. Check ink levels, run a nozzle check to spot the weak color, and clean or replace that single cartridge.
Why is my color document printing in black and white?
This is almost always a setting, not a fault. Look for a grayscale, monochrome, or black-ink-only checkbox in your print dialog and turn it off. Also check the printer’s own menu for a similar mode. Once color printing is selected, your document should print in full color again.
Do I need to replace the whole cartridge if one color is missing?
Not always. First try a nozzle check and one cleaning cycle, since a clog often clears on its own. Reseat the cartridge and remove any leftover tape too. Only replace the cartridge if it is genuinely empty or the color stays missing after cleaning and reseating.
Why do my prints not match the colors on my screen?
Screens glow with light while paper reflects it, so a perfect match is rare. Get close by matching the paper type setting to your paper and letting the printer manage color instead of running two color systems at once. Quality photo paper and a normal or high quality setting also help a lot.
Bringing True Color Back to Your Pages
Wrong or missing colors look alarming, but they are one of the friendliest printer problems to solve. Nine times out of ten the fix is a quick setting change, a supply check, or a single cleaning cycle. Work through the routine above in order and you will usually be back to true, balanced color within a few minutes, with plenty of ink still to spare.
If your pages also show streaks or lines on top of the color trouble, take a look at our guide on how to fix streaks and lines on printed pages, or if things look pale as well, our beginner’s guide to why your prints are faded. Whenever you are ready, PrinterDojo has a friendly, step-by-step guide for whatever your printer throws at you next.


